Multi-sig Accounts
A multi-sig (or multi-signature) account is a special account that requires multiple signatures to sign an extrinsic. Multi-sig accounts significantly enhance security and distribute control of the account. In this section, you will learn how to create and use a multi-sig wallet on Analog Timechain.
Note:
Multi-sig account addresses are deterministic, meaning you can always calculate the address of a multi-sig account by knowing the account’s members and threshold. Since the multi-sig is stored on-chain, you cannot modify it after creation. This means changes to members or the threshold are impossible. Instead, you must dissolve the existing multi-sig and create a new one.
How to create a multi-sig account
Suppose Alice, Bob, and Charlie want to create a 2-of-3 multi-sig account to manage their funds jointly. The following steps demonstrate how to proceed.
Add Contacts
- Launch Polkadot.Js Apps by visiting https://polkadot.js.org/apps/?rpc=wss%3A%2F%2Frpc.timechain.analog.one#/explorer
- Navigate to “Accounts”-> ”Address book.”
- Click "
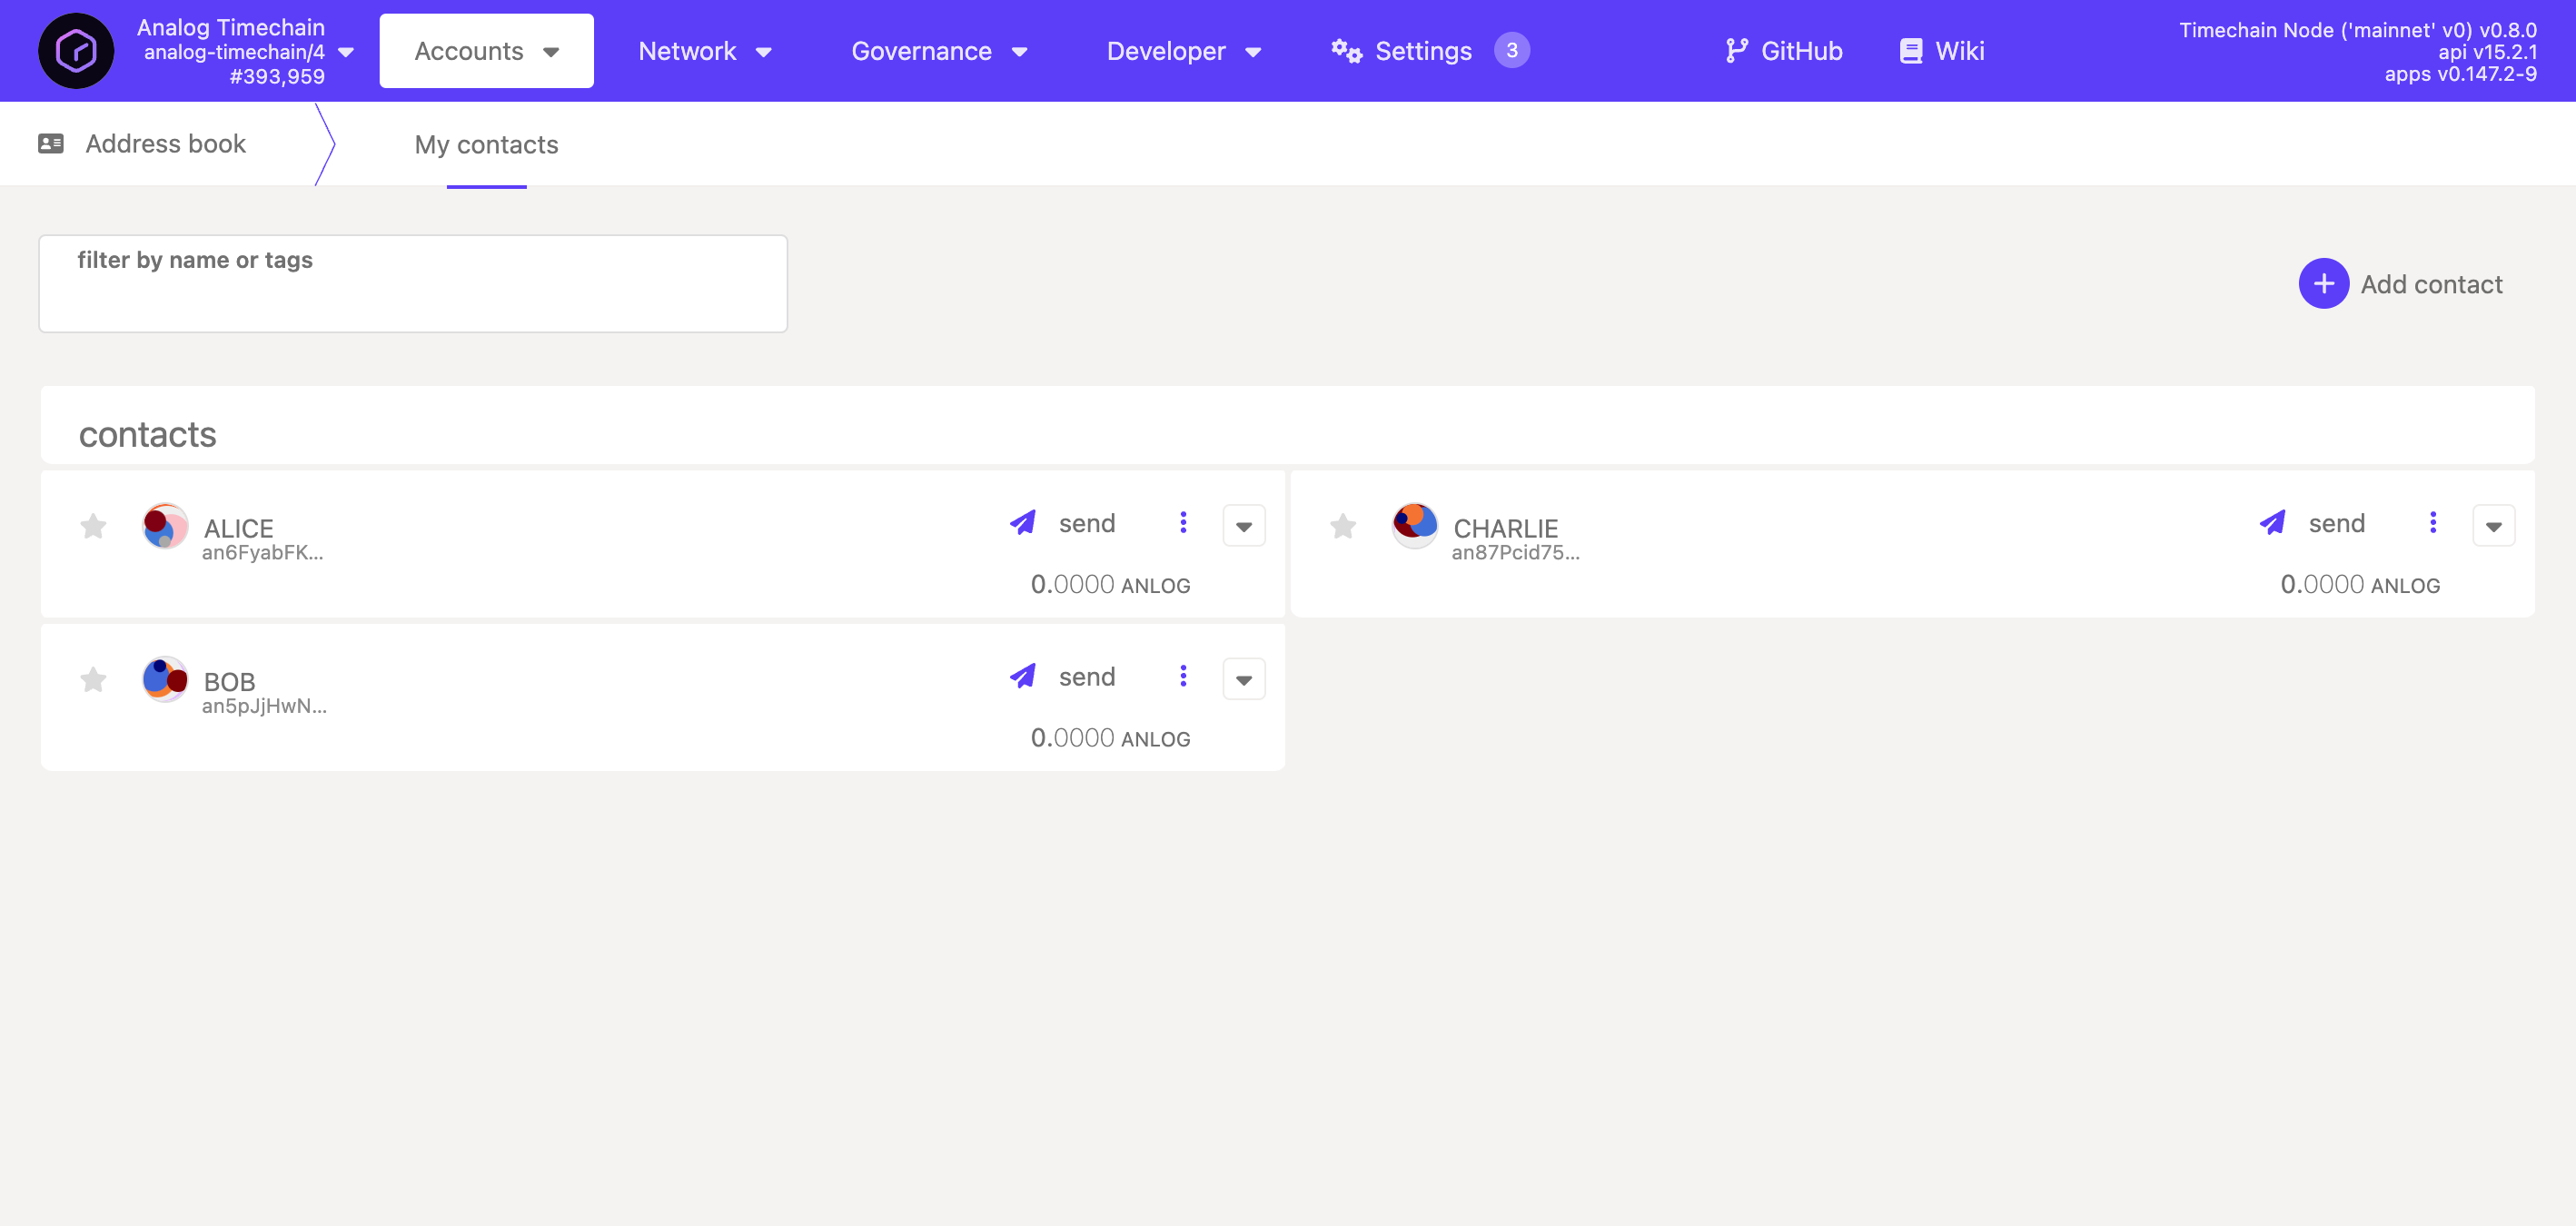
+Add Contact" to create accounts you want to include in the multi-sig wallet. In this example, we’ll add Alice’s, Bob’s, and Charlie’s addresses and give their contact names each time clicking “Save.” - You should be able to see the accounts created as shown here:
Create a new multi-sig wallet
- Navigate to “Accounts”-> “
+Multisig”
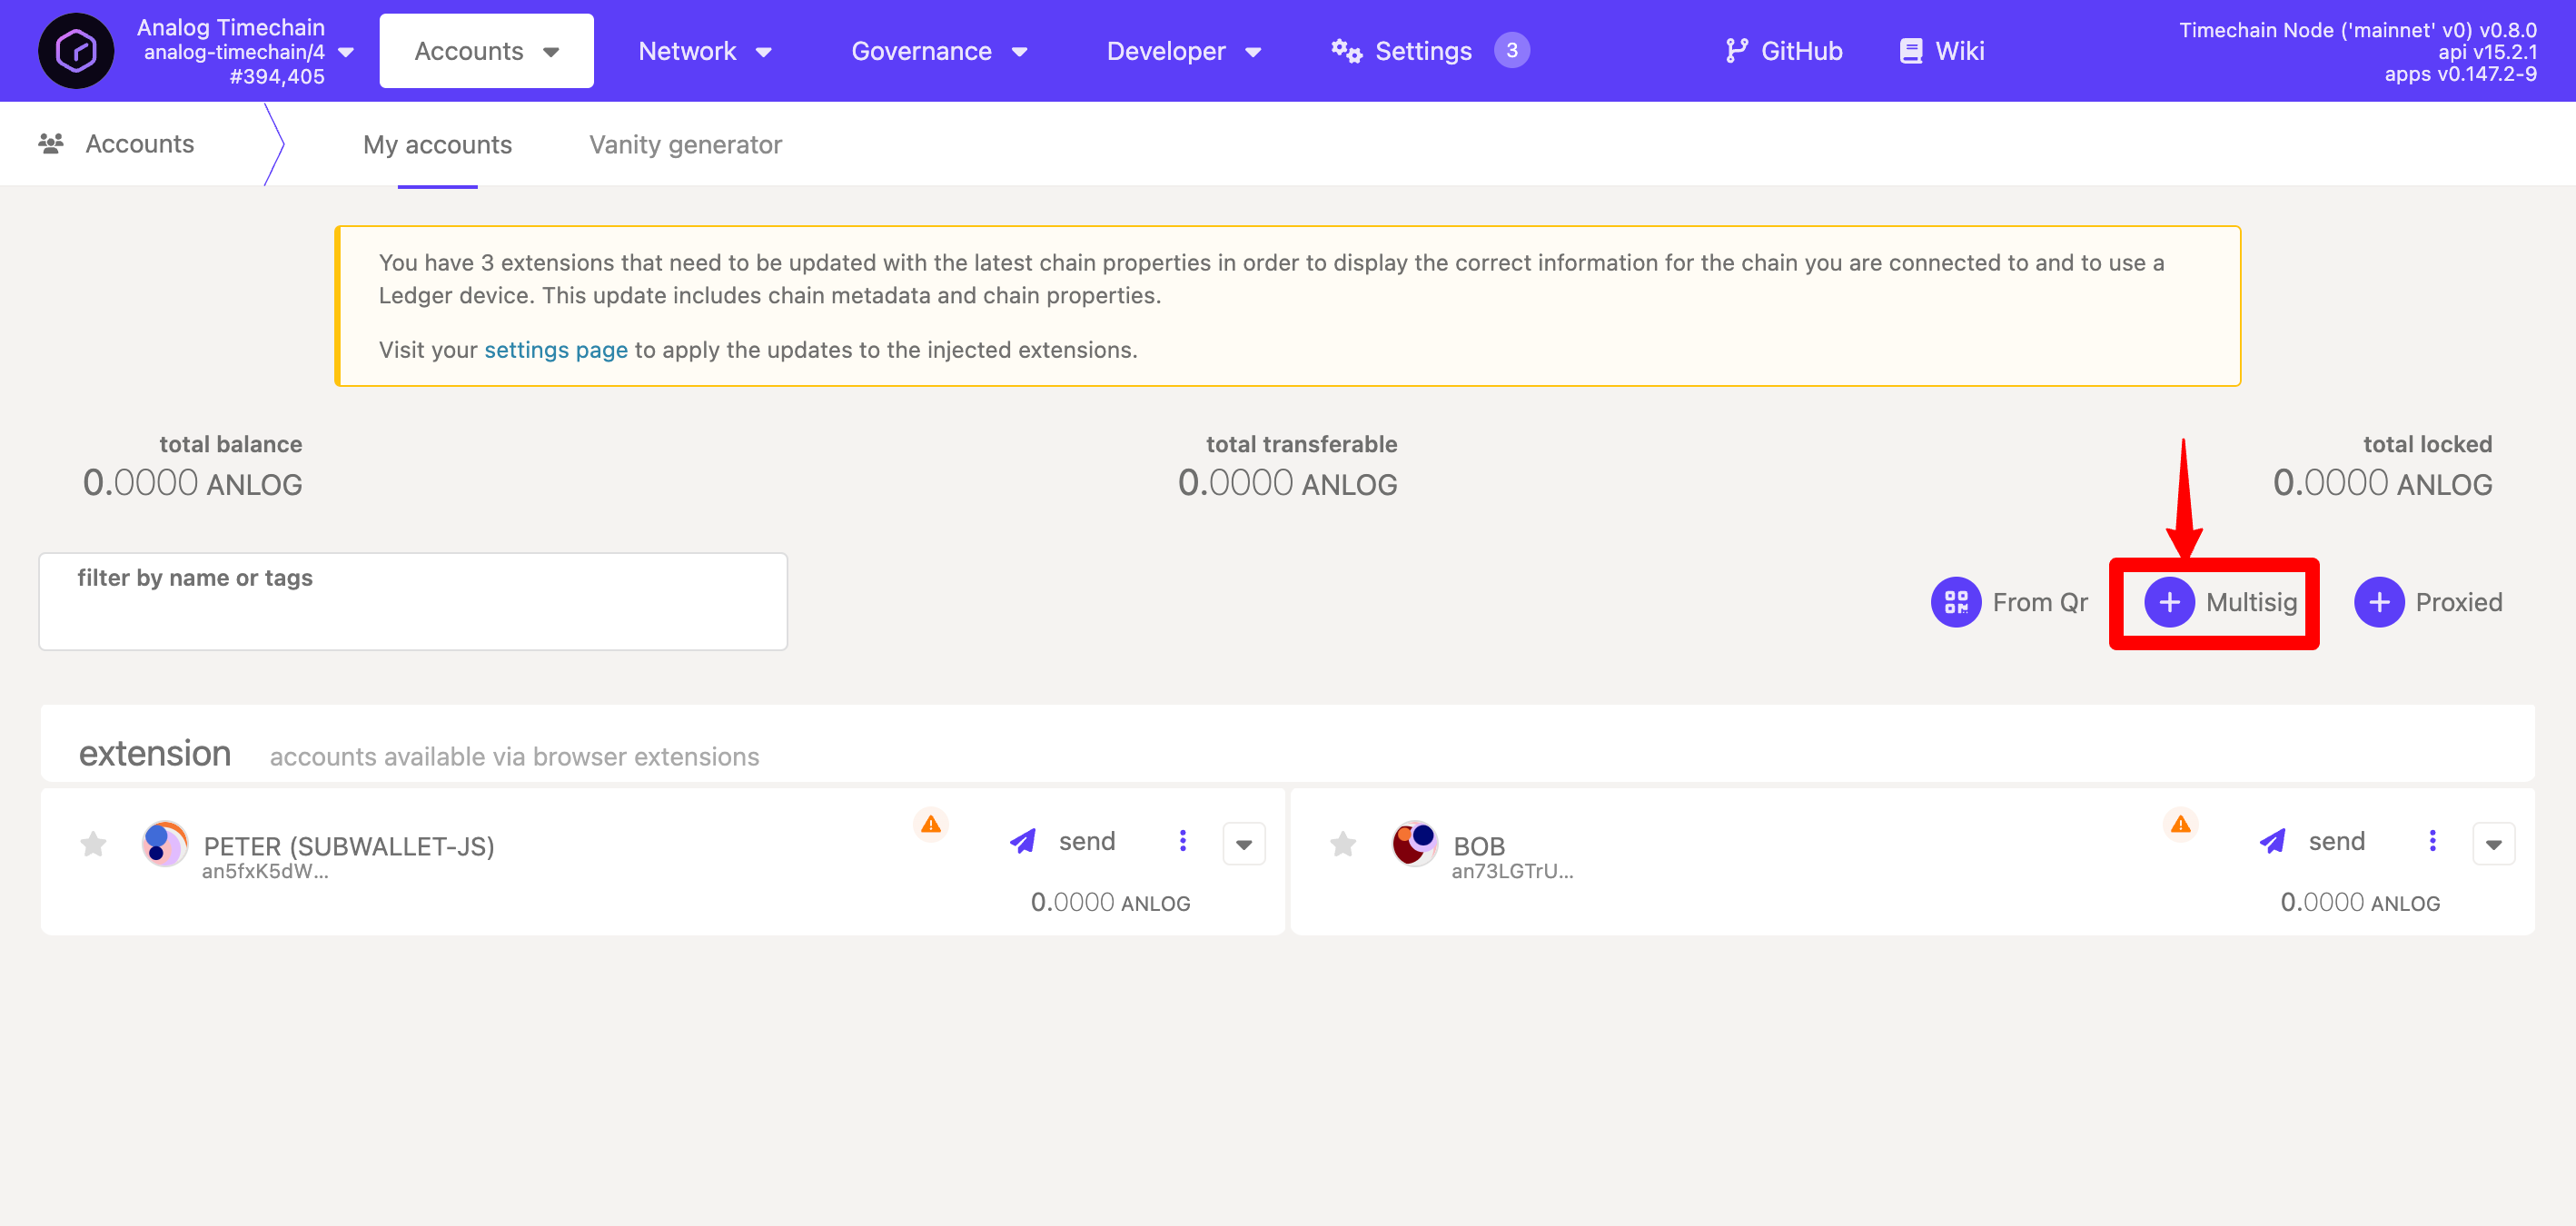
- From the “Available Signatories” column, move the accounts you want to include in the multi-sig wallet to the “Selected Signatories” column. In this case, we’ll include all the three accounts.
- Enter the threshold. In this case, we’ll add a threshold of 2, meaning a minimum of 2 signatories are required to sign an extrinsic.
- Finally, enter the name of the multi-sig account and click on the “Create” button.
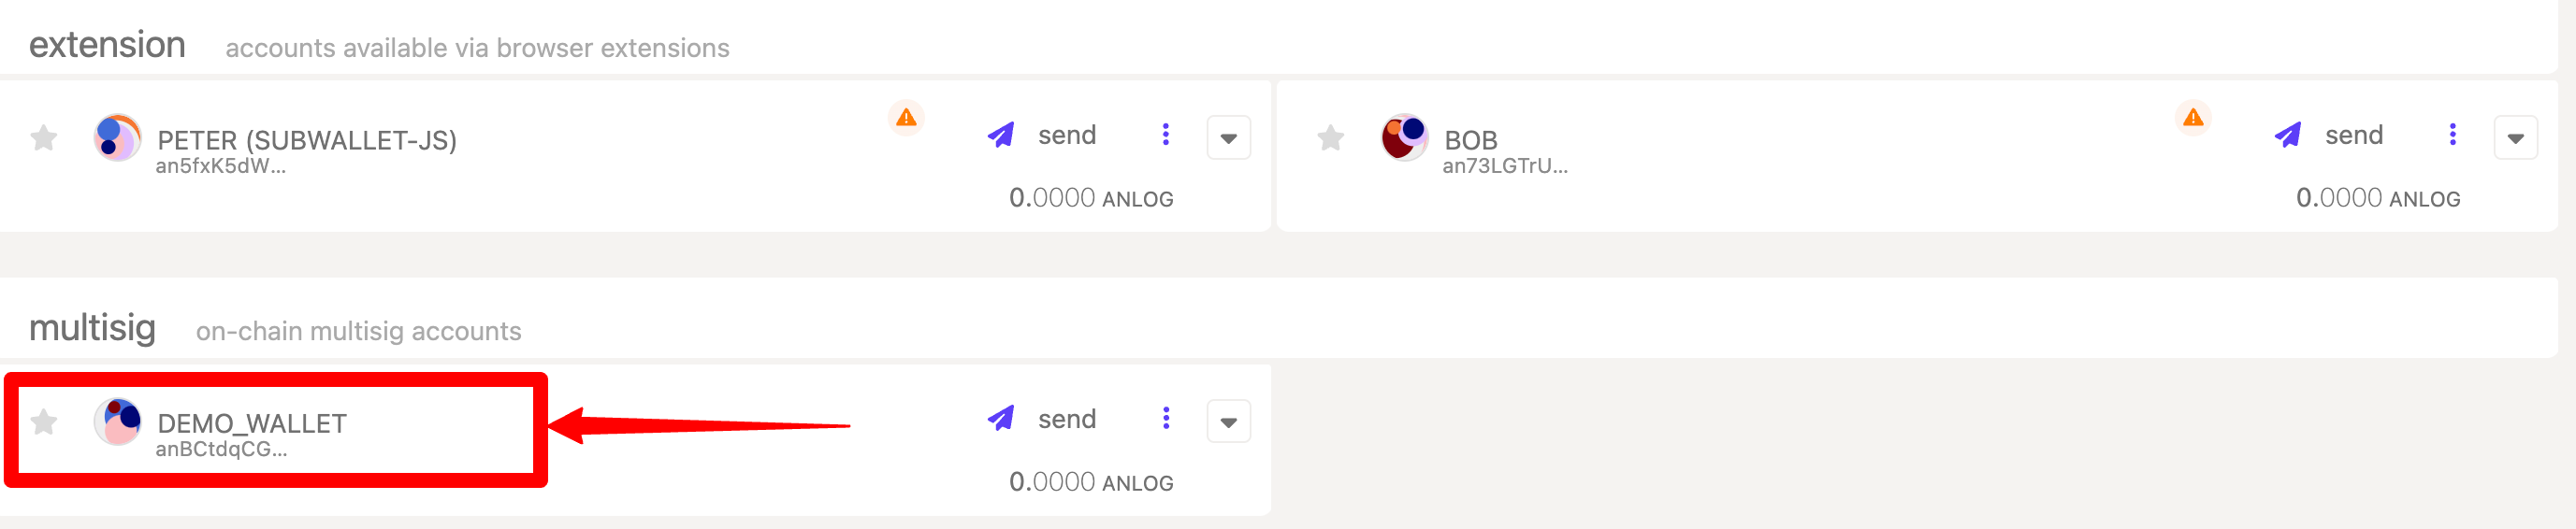
- Congratulations! You have just created a multi-sig account. You can see the multi-sig account on the Accounts page as shown here:
How to use a multi-sig account
Now that you’ve set up the multi-signature wallet, you can initiate a multi-signature call from one of its members (let's say Alice). In this example, we’ll transfer some ANLOG from the multi-sig account to another member, say Bob.
Note that a wallet member (e.g., Alice) must first make a deposit to initiate a multi-signature call. The deposit is locked until the call is executed and serves as a fee for the storage space it takes up on the blockchain. This mechanism discourages users from setting up multi-sig calls that are never executed. The deposit is held within the initiator’s account.
The network determines the deposit value using the formula:
deposit = depositBase + (threshold * depositFactor)The constants depositBaseand depositFactor are predefined parameters established within the chain’s runtime environment. For more details about Substrate multi-sig accounts, check out this documentation .
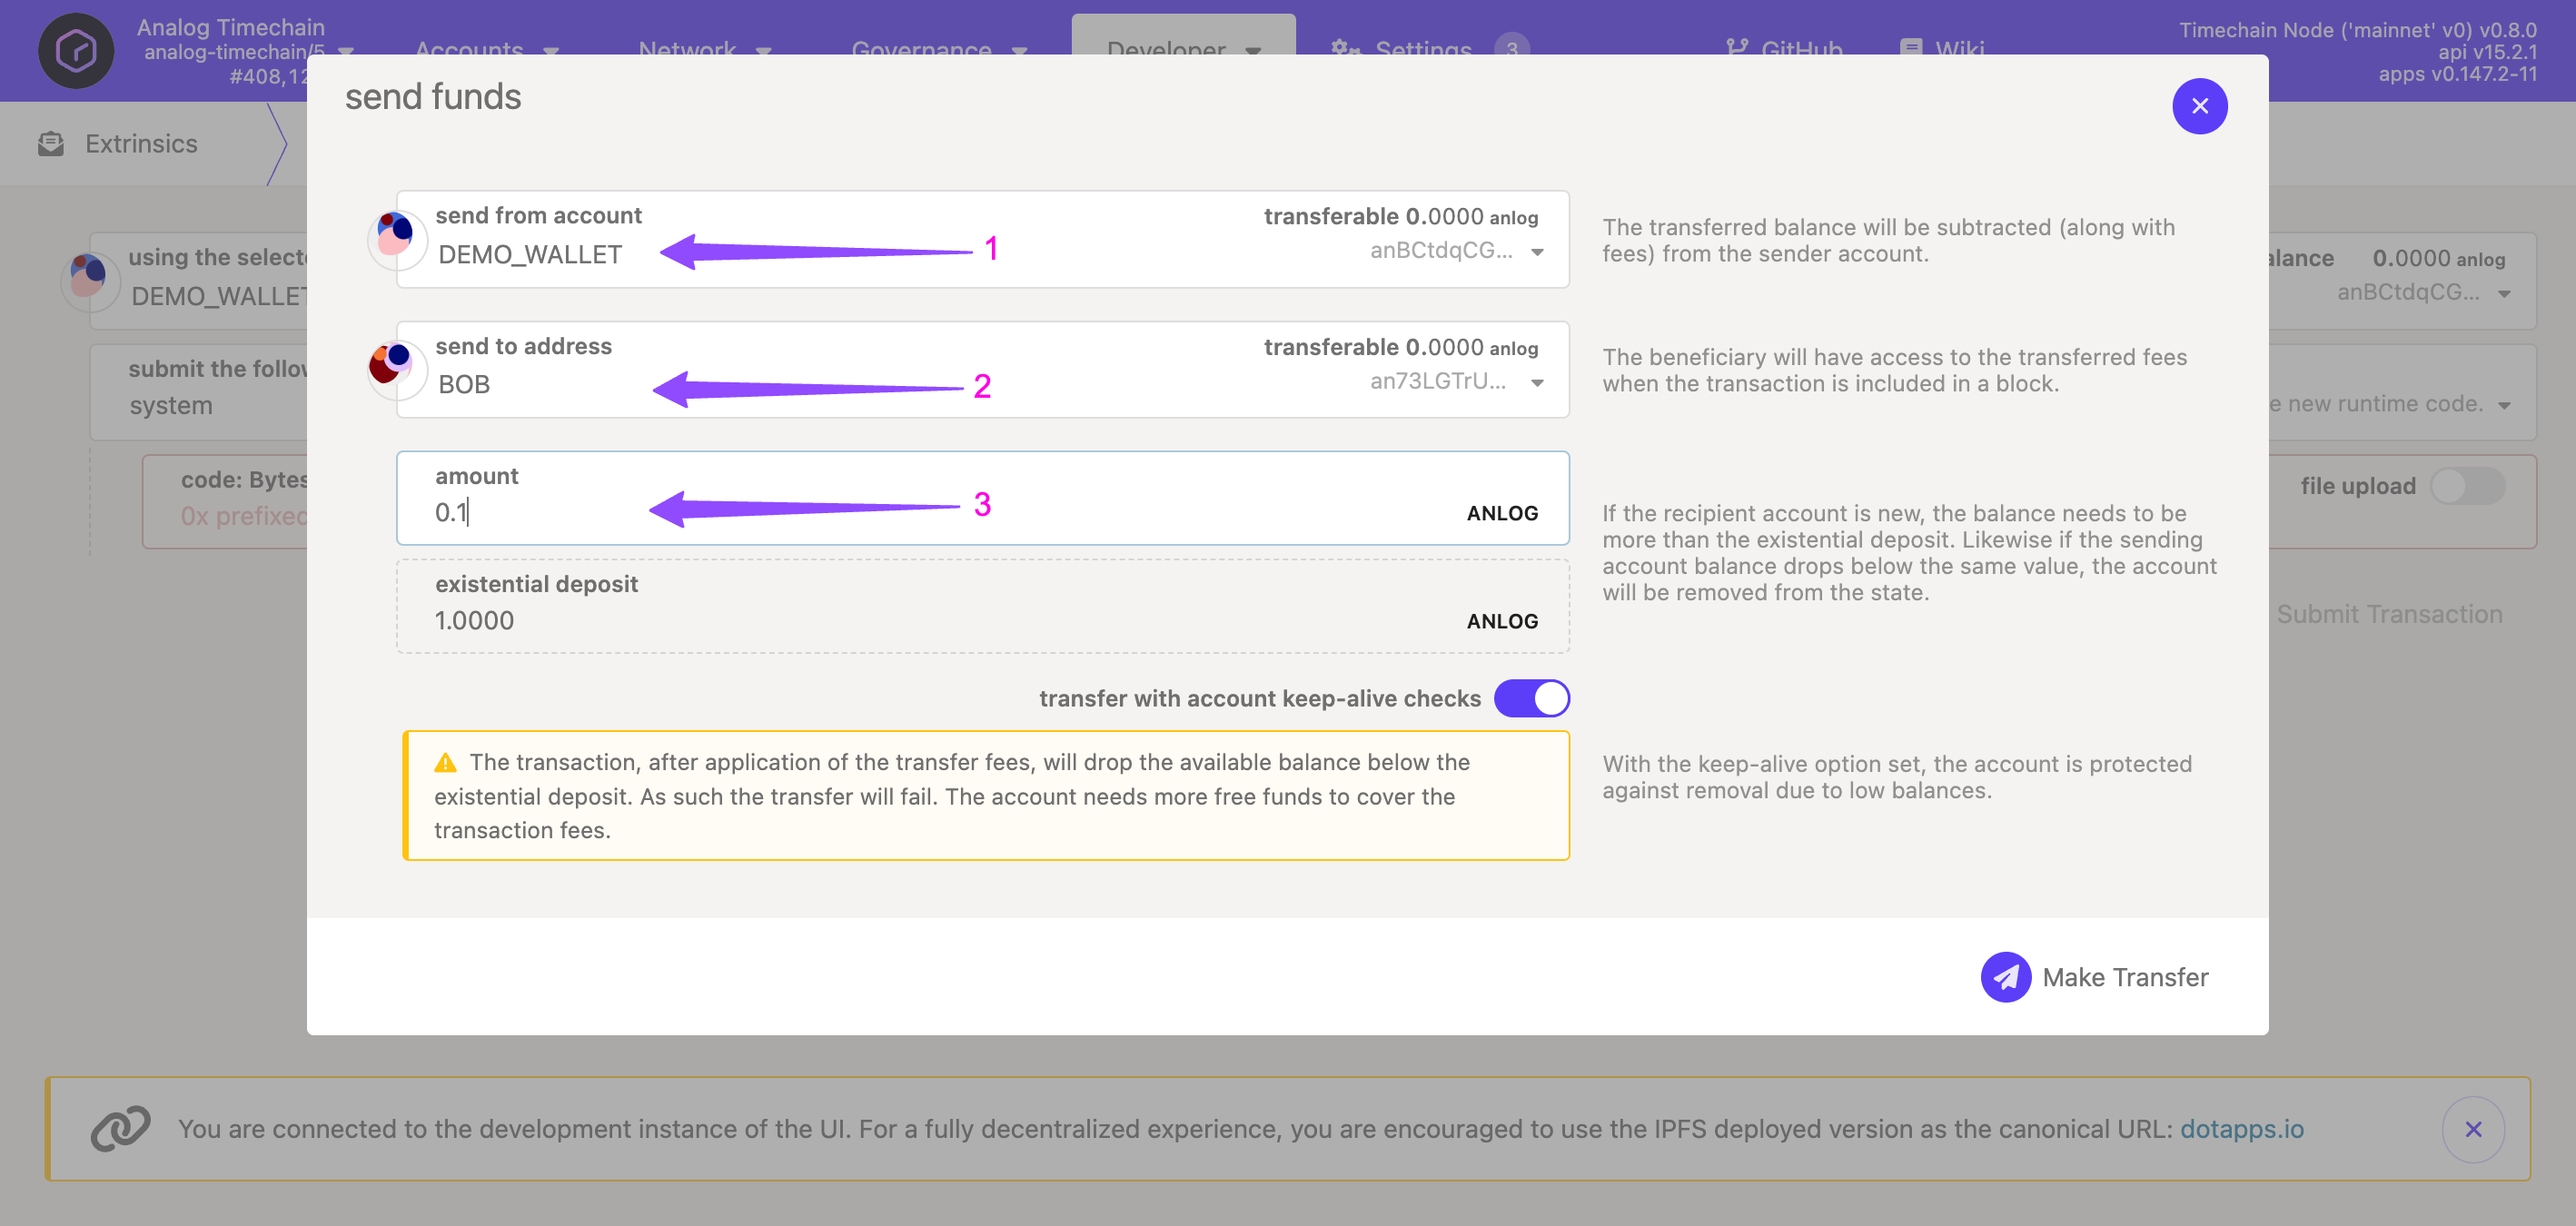
Now that the basics are out of the way, let's create a multi-sig call from the multi-sig account. Suppose Alice wants to transfer 0.1 ANLOG from a multi-sig wallet to Bob’s account. Here's how you'll proceed:
- Navigate to the “Accounts”-> “Transfer” page.
- Select your multi-sig wallet. In this case, we’ll select Demo_Wallet.
- Navigate to the “send to address” pallet and then choose Bob.
- Enter the amount you wish to transfer. In this case, we’ll enter
0.1 ANLOG. - Next, click the “Make Transfer” link to initiate the transfer process. Here's what you should see:
In the screen that appears, you should be able to see:
- The sender account. In this case, the Demo_Wallet
- The signatory that is signing the extrinsic. In this case, it is Alice.
- The "multi-sig call data," which you’ll need to save for later, as Bob and Charlie will need it to approve the extrinsic.
- Now copy the "multisig call data" and share it with Bob and Charlie. Next, click “Sign and Submit.”
- Upon signing the extrinsic, a multisig call is triggered, reserving some deposit (see link for more details in Alice’s account. An icon should appear next to the multisig account, signifying a pending approval for this multi-sig call.
- Bob or Charlie can now hover over the icon and click “View pending approvals” to approve the transaction. Since this call is a 2-of-3 multi-sig, only one of them is needed to approve the transaction. However, the signatory providing the final approval must paste Alice’s “multisig call data” in step 6 to finalize the call.
Note:
Before signing the transaction, the final signatory must verify that what they are signing is accurate and that Alice didn’t make a mistake in sharing “multisig call data” with them.
Here are steps to verify the“multisig call data”:
- Navigate to “Developer” -> “Extrinsics .”
- Locate the “Decode” tab and paste the “multisig call data" in the text box that appears. This should display exactly what the extrinsic is from the multi-sig account.